I don’t really do as much side projects anymore, I find doing 40 hours of full-time programming tends to discourage too much hobby projects and instead I just spend my free time doing more relaxing hobbies that don’t really take any real mental effort, like video games.
I was inspired by a very recent problem at work, where I’m working on a rendering engine that also compiles to WebAssembly (i.e. as close as I comfortably want to get to ‘web development’.)
Specifically, there was an unexpected and considerable performance deficit when initialising a 3D scene on the Chrome browser, which performed fine on a native Win32 platform and also performed nearly as well on Firefox. Evidently there was something browser specific at play.
This project is set up intentionally with a very lightweight toolchain (i.e. not Emscripten.) Just plain C code being compiled by a fairly recent Clang/LLVM version, so it was odd that this was happening.
Now, I personally tend to program with a very crude ‘trial & error’ methodology in all my work. It may not be the most efficient approach, but I particularly like this because it allows me to very quickly learn, and occasionally pick up some interesting observations from iterative approaches in my work - some of which deviate quite a bit from the original goal, but can sometimes provide some interesting bits of knowledge upon retrospection.
In this case, it came in particularly handy. I knew up front that this was something that was browser specific, so I figured there’s little point in trying to change the code around to accomodate a single browser engine. Rather than trying 1 little change at a time, I went for a bit of a “shotgun” approach and made a whole bunch of changes - compiler flags, linker flags, toolchain upgrades.. All kinds of things that in combination were quite impractical, but it allowed me to quickly see if the full combination had any effect. And it did.
At this point I had to go in reverse. Revert my changes one by one until I found what really made an impact. Maybe it was a combination of things? Maybe it was a change that relied on another?
Turns out it was a single change. Changing the initial WebAssembly memory size. Changing this resulted in deserializing my data no longer taking ~5 minutes, but just ~20 seconds. Still twice as slow as Firefox & native variants, but far more acceptable, than.. well.. 5 minutes. Huh? I decided to investigate further why this had such a drastic effect.
For a very brief bit of background, this application sets a very small initial size, but explicitly sets a maximum memory size of 4GB (because at the time, if the maximum isn’t set explicitly, some browsers only allow up to 2GB of memory usage.) Upon closer inspection, I found out that Chrome does not reserve the full maximum address space, unlike Firefox. Instead, when the heap is exhausted, a new address space is allocated and the old data is copied across. This only gets worse over time as the heap gets larger which explains why there’s such a significant performance difference. It looks like Chrome does in fact reserve some address space, but only up to 1GB.
Ironically, setting the initial memory size to 4GB (which sounds like a terrible idea, yes, but bear with me) doesn’t actually initialise 4GB. If anything, it behaves quite similarly to what Firefox was already doing - reserving 4GB of address space / virtual memory, and allocates a small and practical heap up front that grows over time. I’ll have to test this doesn’t cause instability on mobile devices, but otherwise this seems to completely fix the performance problems with loading large data up front.
TL;DR - Chrome doesn’t reserve address space for WebAssembly memory. Consider being bold and setting your “initial” size high if you deal with potentially large data, even if your gut tells you this is wrong. Maybe when memory64 (i.e. 64-bit WebAssembly) becomes standardised this problem goes away, but we’ll see.
]]>A few weeks ago I took an interest in a preview feature of the Unity game engine known as ‘Unity Tiny’. It’s basically a rewritten smaller core, the very base of which comes in at just 72kb.
At time of writing it is has a few limitations and interesting bits about it. The Unity engine itself is primarily written in C++, with developers who use it interfacing with the engine via C# using the Mono runtime. Unity Tiny initially is actually written in TypeScript, at least until it migrates over to using C#. Secondly, Unity Tiny is in an early form of preview and its current feature set allows for 2D games.
I took this as an opportunity to do a few things:
The end result was this simple little game - a simple ‘cube runner’ clone, where the simple goal is to avoid the cubes by moving left and right.
I’ve actually put the full source code online on GitHub as well: https://github.com/JJJohan/TinyCubeRunner
I only spent a few days on this and was pretty happy with the outcome. I was able to familiarise myself better with TypeScript and the surrounding ecosystem (Node.js, linters, an appreciation for VS Code’s TypeScript editing compared to Visual Studio’s somewhat less ideal alternative (although I still greatly prefer it for everything else.) and a silly little 3D fakery achieved with a projection matrix.
The game can be viewed in full on this page - it works on both regular computers as well as mobile phones surprisingly well: https://renscreations.com/files/cuberunner/
For further details I recommend visiting the GitHub link above as I posted some more technical notes in there.
]]>Last week I spent a bit of time trying to reverse a few of the remaining data files that aren’t yet parsed in Open76. Looking at it now there actually aren’t many left. Right now the only notable one I can think of is the XDF file format and I’m already aware of what it is - it basically consists of the animated sprite effects; explosions, muzzle flashes, smoke, dust clouds, etc.
Most of the data file exploring I’ve done is using a hex editor and scouring the internet for any references to other people having done the same. Most of the time this is enough since the more data that’s uncovered, the missing pieces can become a simple case of ‘connect the dots’.
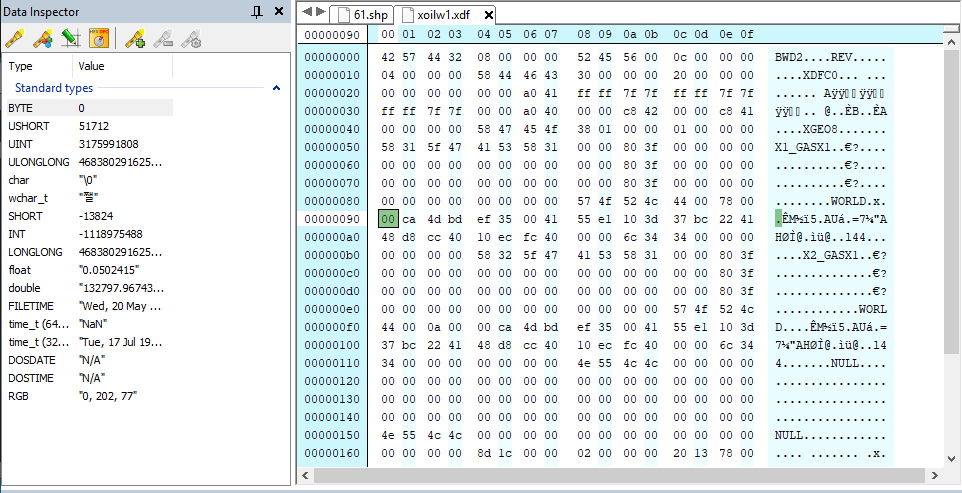
This time I spent a bit of time exploring the less exciting files - not the main game content itself but the UI assets, which appear to be located in the DATABASE.MW2 file located in the game directory. The interesting thing is that unlike the other large ZFS archive file, there are no real IDs or names for the contents of the database. The only real access point is a list of offsets in the file which correspond to files. Inside the database there are a number of files:
All of these, with the exception of the FNT files are parsed correctly. Because of the fact there was compression and other obstacles involved there were some roadblocks. What’s particularly helpful is that because Interstate 76 uses the Mech Warrior 2 engine, some of these formats were already reversed by community members of the MW2 engine.
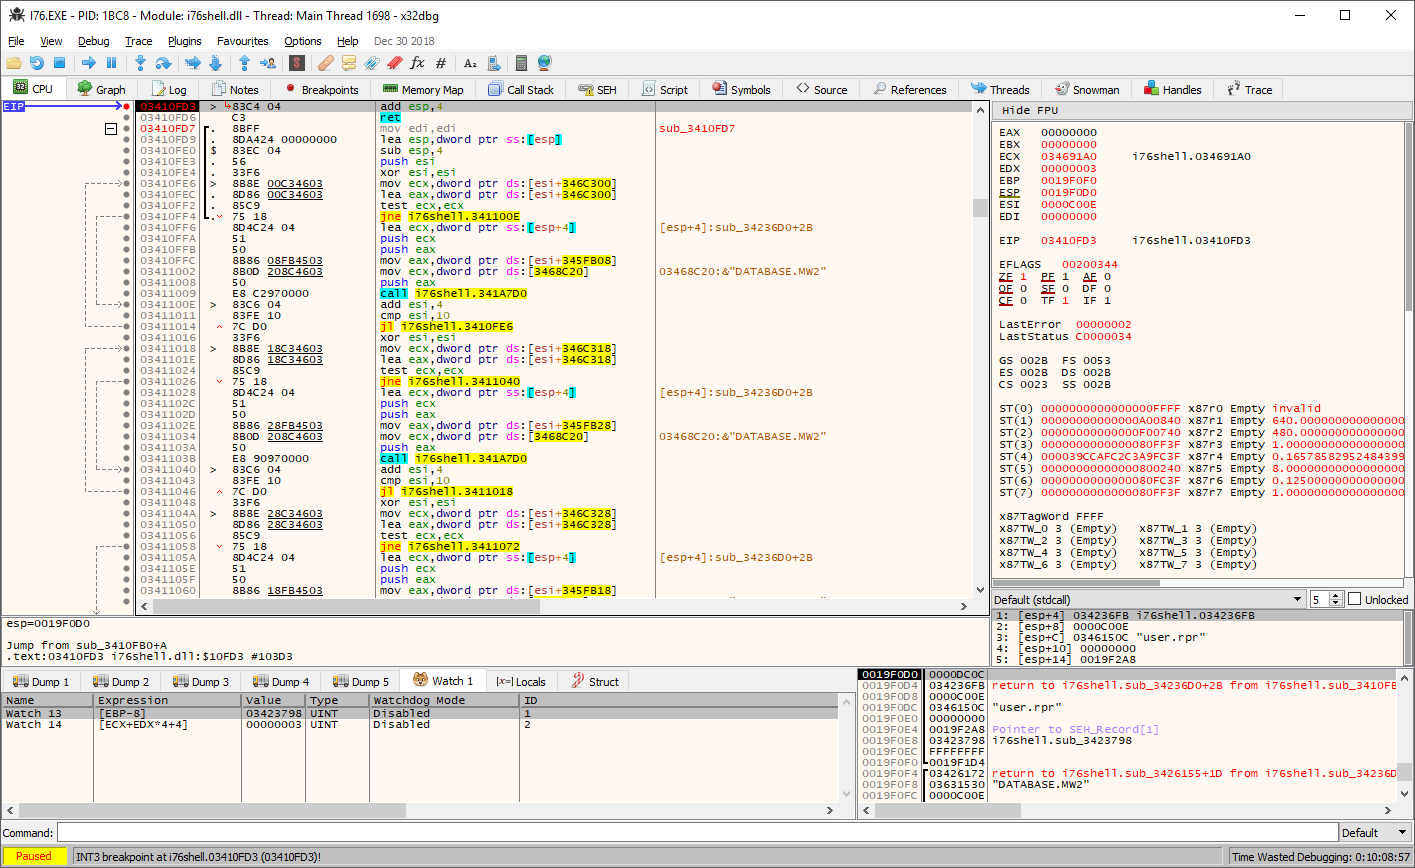
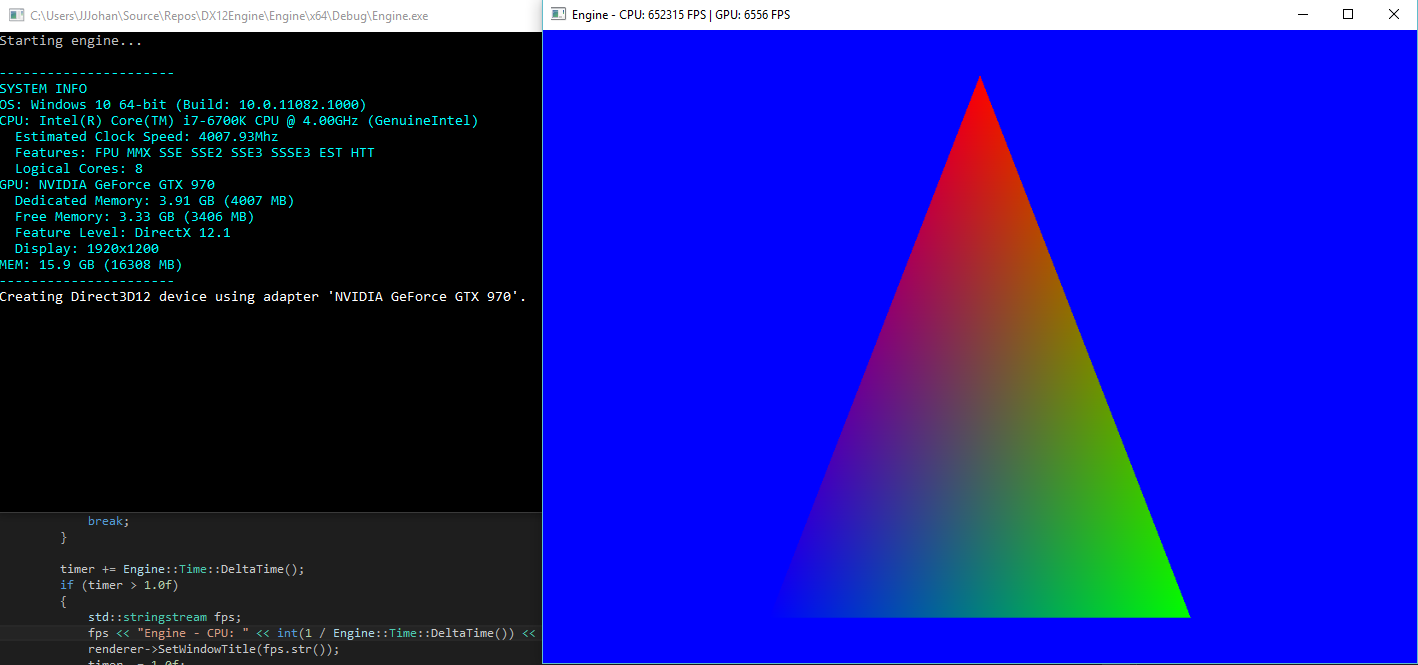
I also spent a fair bit of time looking through a debugger. This was interesting, however quite a slow process, primarily because the only reverse engineering experience with such a tool I have is from working on this project. While I can somewhat see what’s going on from the disassembly, there’s quite a contrast between assembly and object orientated languages such as C++ or C# which I’m used to. Nevertheless I found some interesting albeit not particularly helpful things such as a random user.rpt file reference that doesn’t go anywhere, yay!
The end result though is that with the DATABASE.MW2 contents figured out, Open76 now has an identical main menu, bringing it one step closer to its goal.
]]>Interstate 76 has a variety of different file types. A large chunk are geometry & textures, there’s a few text files, some sound files and some more specific data files. One of the specific files I looked into recently were the GDF files. While it’s a rough guess, I’m guessing it stands for ‘Gun Data File’ or some sort, as they’re specific to the weapons that vehicles have.
An asterisk before the offset indicates this extra data only appears in the updated version of the game which has had some small changes to the data files.
GDFC block
Offset | Type | Length | Description | Value (in glandmin.gdf) |
---|---|---|---|---|
0 | String | 16 | Weapon name | Landmines |
16 | Int32 | 4 | 6 | |
20 | Int32 | 4 | 3 | |
24 | Float | 4 | 160.0 | |
28 | Float | 4 | 100.0 | |
32 | Float | 4 | 70.0 | |
36 | ? | 8 | ||
44 | Int32 | 4 | 240 | |
48 | Int32 | 4 | Fireproofing | 200 |
52 | Float | 4 | 60.0 | |
56 | String | 13 | drp05 | |
69 | ? | 9 | ||
78 | Float | 4 | Firing Rate | 1.0 |
82 | Int32 | 4 | Fire Amount | 1 |
86 | Float | 4 | 1.0 | |
90 | Float | 4 | 2.101948E-44 | |
94 | Int32 | 4 | Ammo Count | 25 |
98 | Float | 4 | 0.7 | |
102 | String | 13 | Firing sprite | null |
115 | String | 13 | Sound Filename | mines1.wav |
*128 | Int32 | 4 | 1 | |
*132 | String | 16 | Enabled Sprite | 3landmines_on |
*148 | String | 16 | Disabled Sprite | 3landmines_off |
GPOF block - 192 bytes
Offset | Type | Length | Description | Value (in glandmin.gdf) |
---|---|---|---|---|
0 | ? | 192 |
GGEO block - 4 bytes if no geometry, else 2404 bytes)
❗️❗️ This is the same data layout as the SDF file - you can re-use the SdfPart class. ❗️❗️
Offset | Type | Length | Description | Value (in glandmin.gdf) |
---|---|---|---|---|
0 | Int32 | 4 | Number of parts | 0 |
ORDF block - 133 bytes (137 in GoG version)
Offset | Type | Length | Description | Value (in glandmin.gdf) |
---|---|---|---|---|
0 | ? | 16 | ||
16 | String | 13 | null | |
29 | String | 13 | null | |
42 | String | 13 | null | |
55 | String | 13 | xmine1.xdf | |
68 | String | 12 | xemt1.wav | |
80 | Byte | 1 | 132 | |
81 | String | 12 | xmine1.xdf | |
93 | Byte | 1 | 130 | |
94 | String | 13 | null | |
107 | String | 13 | xmine1.xdf | |
120 | String | 12 | null | |
132 | Byte | 1 | 130 | |
*133 | ? | 4 |
OGEO - 104 bytes
Offset | Type | Length | Description | Value (in glandmin.gdf) |
---|---|---|---|---|
0 | Int32 | 4 | 1 | |
4 | String | 10 | MLNDMINE | |
14 | ? | 46 | ||
60 | String | 12 | WORLD | |
72 | ? | 32 |
After doing some testing with a hardcoded vpp01.vcf for now (just to try and recreate a one-to-one match with the training mission for reference purposes.) I’ve found another slight obstacle.
It appears that there is a bit of complexity to the GGEO table..
There are 24 part slots, that are 100 bytes each. Using gmlight.gdf as a reference we can get a bit of information:
The hardpoints on the piranha are setup like so:
Hardpoint (HLOC) Index | Name | Description | Unknown 1 | Unknown 2 |
---|---|---|---|---|
0 | PP1_GDB1 | Back Dropper Hardpoint 1 | 2 | 4 |
1 | PP1_GIB1 | Back Hardpoint 1 | 2 | 5 |
2 | PP1_GPF1 | Top Hardpoint 1 | 1 | 1 |
3 | PP1_GPF2 | Top Hardpoint 2 | 1 | 1 |
We can see from the hardpoint’s name, e.g. PP1_GDB1:
The weapons in the VCF are setup like so:
Hardpoint (HLOC) Index | Name | Description |
---|---|---|
0 | goilslck.gdf | Oilslick |
1 | gmlight.gdf | 30 Cal |
2 | gmlight.gdf | 30 Cal |
3 | gdumb.gdf | Firerite Rocket |
Diving deeper into gmlight.gdf we get these geometry names for the 24 slots in GGEO:
GGEO Index | Name | Parent | Description |
---|---|---|---|
0 | GMLP11GN | WORLD | Top, LOD level 0 |
1 | NULL | NULL | |
2 | GMLP21GN | WORLD | Top, LOD level 1 |
3 | NULL | NULL | |
4 | GMLP31GN | WORLD | Top, LOD level 2 |
5 | NULL | NULL | |
6 | GMLS11GN | WORLD | Side, LOD level 0 |
7 | NULL | NULL | |
8 | GMLS21GN | WORLD | Side, LOD level 1 |
9 | NULL | NULL | |
10 | GMLS31GN | WORLD | Side, LOD level 2 |
11 | NULL | NULL | |
12 | GMLT11TU | WORLD | Turret base, LOD level 0 |
13 | GMLT11GN | GMLT11TU | Turret gun, LOD level 0 |
14 | GMLT21TU | WORLD | Turret base, LOD level 1 |
15 | GMLT21GN | GMLT21TU | Turret gun, LOD level 1 |
16 | GMLT31TU | WORLD | Turret base, LOD level 2 |
17 | GMLT31GN | GMLT31TU | Turret gun, LOD level 2 |
18 | GMLI11MZ | WORLD | Inside, LOD level 0 |
19 | NULL | NULL | |
20 | GMLI21MZ | WORLD | Inside, LOD level 1 |
21 | NULL | NULL | |
22 | NULL | NULL | |
23 | NULL | NULL |
Note there is some more data in each slot but some of it’s not relevant, or figured out.
We can see from the filename that it has a similar layout to the weapon hardpoints.
[3 letter weapon name][weapon type][LOD level][Part number][Unknown]
Yep, ‘unknown 2’ is the weapon mesh index. Unfortunately there doesn’t appear to be something similar in the GDF file so I’m still using the 3rd index in the label. The good news is the label is always 8 characters long so it’s not likely this will break.
For now, some eye candy - The drone training vehicle correctly using the “inside” mesh (really just a circle) for the front weapons and the “side” mesh for the side weapon.
]]>It’s been around 2 and a half years since the last entry, so it’s probably time for a new one.
Recently I learned about a project called Open76. What it aims to do is basically get the game Interstate 76 working on modern machines using the Unity engine. Since I’m a big fan of the original game and I use the Unity engine at work, I figured I’d take a closer look. Interestingly this is the first Open Source project created by someone else that I’m contributing to as well.
After replaying the entirety of the original game using the GoG release to refresh my memory on the gameplay I’ve decided to delve right in. So far most of the assets seem to have been figured out. Most of the data files were reverse engineered over several months by someone known as ‘That Tony’. His blog posts were certainly an interesting read into how the game ticks.
While a majority of the assets were available and cars were derivable, the world was more or less devoid of life. Cars would spawn but they wouldn’t move, you can’t shoot at anything and so far the missions basically put you at your starting location, that’s it.
What I began to look at was giving the AI controlled cars some basic life support - so I started to implement some path finding for them. Closely monitoring the original game as well as the data that’s now being read in this project it became clear that cars appear to be given a destination in the form of a ‘path’, but the way they get there is by following the roads in the level. Putting this information together I created some simple pathfinding.
In my first iteration I simply had cars following the paths directly, which meant they would often happily drive off of cliffs to their demise.
First revision:
The second iteration was a little more forgiving to the poor sods and actually has them following the roads. Nothing particularly fancy yet - no collision avoidance or awareness of the player, but it certainly makes them look a lot more intelligent than sitting still.
Second revision:
]]>This isn’t overly significant but provides a stable foundation for me to work with. One project is dedicated to all engine features and development, one for testing it, adding various custom binds and what not, and finally a unit test project that’ll ensure components of the engine remain in a working order.
Unit tests aren’t new to me but I haven’t actually used them before in C++. There isn’t much difference in implementation since Microsoft’s Unit Test Framework is solid and built right into Visual Studio.
Something that is entirely new to me however is C++/CLI. What I’ve been interested in doing for some time now is to develop a user interface with the engine running inside it as a small sub-region. This could be used for example, to create a level editor. C# .NET is excellent for developing user interfaces, however the engine is written in C++ language. There is the option of using COM Interop, but not only is this potentially slow, it’s also making things overly complicated.
A C++/CLI project is essentially Managed C++, capable of interacting with both native C++ and managed code, making it ideal for creating a bridging interface between the engine and any potential C# applications.
So far I’ve ‘ported’ most of the engine’s API calls over and am able to almost entirely replicate the image in my last post with a few small exceptions (primarily the second image) as I’m investigating an issue with vertex buffers and/or transforms (an interesting combination, no?)
I’ve also looked into designing a VSIX project which would basically allow me to create a WPF or Winforms ‘Toolbox Control’ so I can drag and drop an ‘Engine component’ onto a form and have it load. Unfortunately after an uneventful night this proved unsuccessful possibly due to the native library dependencies involved.
Fortunately I’ve had better luck simply hooking the engine up to the window handle of a WinForms component. As WPF only uses a single window handle for the main window, I’ve used a WindowsFormsHost component to still allow the flexibility of WPF while allowing me to hook up to a handle for this result (UI design not final ☺!):
]]>Ever since details of DirectX 12 began to surface, I became interested in learning about it as most of my recent programming has been done through C# rather than C++, and the last time I worked with DirectX was very briefly with version 11 which had more of an emphasis of creating an abstraction layer above OpenGL/DirectX than an actual engine and prior to that, DirectX 9.
My main problem was hardware capability as my 2009-released AMD 5870 was simply not compatible with DirectX 12, but after purchasing a GTX 970 the opportunity arose, bundled with a two week holiday off work which was particularly motivating as already doing 40 hours of full-time programming a week reduces my appetite for after-hour hobby code projects. Fortunately it’s now been two weeks since I’m back at work and I’m still going.
This is the current state of the project. Visually it’s not very exciting and if anything makes me look awfully novice at any rate. Right now I’m putting most of my effort into developing a solid back-end that is capable of dynamically allocating resources when I request them, taking advantage of DirectX 12’s parallel capabilities where possible.
The latest feature implemented is the text renderer, which has the ability to either render to screen space or to world space. When rendered in screen space, it remains the same size when resizing the window and any transformations applied are done consistently through a Transform class object which is overridden for 2D positioning.
Buffers are particularly unique in this case, where I try to pool as much data as possible for a low frame overhead. In the above image there are three objects – 2 “squares” and 2 text objects. All are combined into a single index buffer, single vertex buffer and have each reserved a single constant buffer slot.
At the risk of overextending this post and allowing for future updates I’ll leave it at that, and rather than just posting about any progress I might go into further detail on some in-depth rendering techniques in the future as well.
]]>Over the next few months I have started to personalise the car to my liking by modifying it in various ways, such as installing a high-flow dual mid exhaust, raising the MAF sensor, replacing the fuel injectors, installing a new radio, installing a new high-flow exhaust header and finally a spoiler before the end of 2014. I’ve participated in cruises taking me through rainforests, curvy mountain roads, city streets and tested out both my car and myself on a hill climb track.
Driving the car has become part of my lifestyle and I see the car as a long-term asset. 2015 will be an interesting year for it, with a heavy duty clutch, extremely light weight flywheel (going from 6.8KG to 3.8KG) and at the end of the year a complete turbo kit which will bring up the engine performance from around 150 horsepower to ~360 depending on a stable level of boost. Further down the line I may look at additional enhancements such as a finishing bodykit and, an aftermarket coilover kit and strengthened sway bars.
]]>A workaround was to manually edit the DNS address on the device, but doing this with a TV remote isn’t the most sophisticated of methods. The next idea was to simply point the DNS address to the router and have that changed, much faster on a computer. There was still the repetition and problematic approach of having to log in and fetch one of the two DNS addresses aside from trying to memorise them.
The solution ended up being a little C# utility, which would log into the router automatically and perform the necessary changes using the built in features of the WebBrowser class using a very simple 2 button interface. All I got to do now is fire up the program, hit the show I want to watch and after the router resets I’m good to go!
It’s interesting to program something that not only works but actually solves a real-world practical problem to make life easier. Here’s hoping there’s more where that came from.
]]>Having started rather late within the year I’ve spent two weeks getting used to the software I’ll be working with and taking in all kinds of new knowledge straight away. Tasks have been varied and have ranged from setting up virtual machines on a server box to writing cross-language wrappers.
The company itself is relatively new and produces BIM software which, in a pretty rough summary means it specializes in software that allows engineering companies to review and monitor all the components within their projects as well as all the surrounding assets such as documentation.
More information about the company can be found on the company website.
]]>